Why are there CEGUI problems
Since the Ogre 1.7 version, CEGUI is not an Ogre dependency anymore using its own basic interface for its samples now, instead of CEGUI.
So if you want to use cegui, you have to download and install it. But there is a small problem. According to the cegui founder, crazy eddy,
The problem is that the 0.7.1 binary download of CEGUI was produced before the Ogre 1.7.0 release existed, so the CEGUIOgreRenderer module that comes with that download is built against the 1.6.x version of Ogre. You need to either build CEGUI yourself - against the updated Ogre release. See this post(for more information)
i hate compiling projects myself. But i guess we have no choice.
So, how do i build CEGUI myself (choice 1)
by following the steps below carefully, you may get to build CEGUI in 5 steps.
1. read this short post on building CEGUI """C A R E F U L L Y"""
and use it to generate a valid solution file for visual studio
2. remember to download BOTH the cegui source code AND the cegui dependencies.
3.copy the "dependencies" directory to the "CEGUI source code directory" so that the Cegui source directory should have a directory called "dependencies" having its necessary dependencies.

4. make sure that your project can find the necessary include files and libraries by setting the following properties.
First choose the CEGUIOgreRenderer project and modify its properties as follows:
To the include directories
-Add boost_1_42
-Add "include/Ogre"
-Add "include/Ois"
To the link library locations, add these directories
-Add "lib/debug" for debug configuration and "lib/release" for the release configuration
-Add "boost_1_42/lib" for the boost library
5. Now select the CEGUIBase project and build it in both the debug and release configurations. You may see some warnings but the build should be successful.
So, how do i build CEGUI myself (PART 2)This part is optional and it is simply a repeat of the steps above. Just that i try to show you the pictures (remember, a picture is worth a thousand words) :)
1. download the latest cegui source code and the cegui dependencies.(at the time of writing, its CEGUI-0.7.1)
2. extract the cegui source code and navigate to the directory ""CEGUI-0.7.1\projects\premake""

3. Edit the config.lua and edit the Ogre and OIS paths accordingly, so they will point to your SDK files.

4. We only need to the OgreRenderer so set all other renderers to false in the config.lua file.
5. Execute the "build_vs2008.bat" assuming you are using visual studio 2008. You should now see the solution file (.sln)
6. open this solution file.
7. select the "debug" configuration if it isn't already selected.
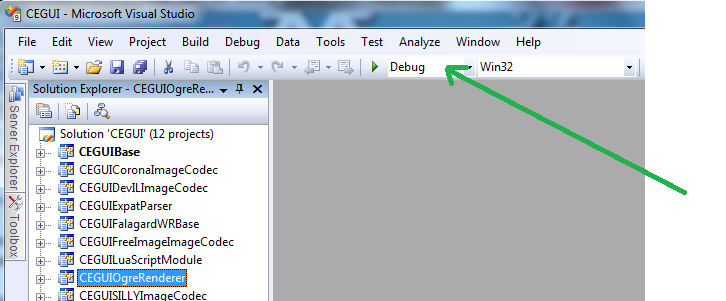
8. select the ""CEGUIOgreRenderer"" project and modify its properties as follows

under C++ >general > additional include directories
a . Add the OGRE include directory
b . Add the BOOST library directory (because ogre uses boost library)
c . Add the OIS include directory

under Linker >general > additional library directories
a . Add the BOOST ""lib"" folder.
b . Add the OGRE ""lib/debug"" or ""lib/release"" if you are in the release configuration.

9. Select the CEGUIBase project and build under the debug configuration. (It should build successfully)
10. Repeat steps 7 - 9 and build the release configuration (it should also build successfully)
Testing our CEGUI
Try to compile the basic tutorial 7 from the ogre
It should compile and run with no problems

No comments:
Post a Comment